Almost every disappointing AI video starts the same way. Someone has a photo they love — a product shot that finally looks right, a portrait where nobody blinked, a poster they spent a weekend on — and they hand it to a generator with a sentence like "make it cinematic." The render comes back a few minutes later. The subject is roughly there. The face is not. The label on the bottle has grown a second line of gibberish. The camera has invented a doorway on the left side of a room that never had one.
That is not a model being bad at video. It is a mismatch between what the person asked for and what the model was built to do. An image to video model is not a filter, an animator, or a 3D rig. It is a system that takes one frame it did not shoot, holds it up as the ground truth, and then guesses what happened next — sixty times a second, for as many seconds as you paid for. Everything that goes wrong in the average first take comes from that guess being under-constrained.
This guide is about constraining the guess. It walks through what the five phrases people type into a search bar actually mean, why starting from a still usually beats writing a scene from scratch, how to write a motion brief that a model can obey, and where the specific failure modes come from. The worked example is Z Video at z-video.co, a browser workspace that puts four renderers behind one upload tile, read on November 5, 2026. It is an independent web product; it is not OpenAI, Google, or ByteDance, and the model names it lists belong to those companies. This page is a guide published on happyhorse2.video, which does not run that workspace, and a credit balance in one place does not spend in the other.
Five search phrases, one job, three variables
The same request arrives under at least five different names, and the names hide three separate decisions.
Image to Video AI Generator is the tool-shaped phrase. The person wants software, not a technique. They have a file on disk and they want a clip out of it. The relevant questions are upload limits, output length, resolution, cost per render, and whether the download is clean.
AI Video Generator is broader and mostly refers to text-to-video. This is the phrase that sends people to the wrong box. A general AI video generator will happily accept a paragraph and invent a whole scene — a rooftop, a coastline, a stranger's face. Ask it to reproduce your bottle on your table and it will produce a bottle on a table, which is not the same thing. The distinction matters: one tool invents a subject, the other inherits one.
Photo to Video AI is the input-shaped phrase. It describes a workflow, not a product: a photo goes in, motion comes out. It is also the phrase most often paired with a specific job — a product listing that needs motion, a real-estate still that needs a slow reveal, a family picture that needs to stop being flat.
AI Image to Video is the technical name, and it is the one that maps onto how the models are actually built. The uploaded image is conditioned as the first frame. The model does not "look at" the picture the way a human does; it encodes the frame into a compressed representation and then denoises a sequence that is anchored to that representation. That anchoring is why the composition, the light, and the subject's identity survive at all — and why they degrade in predictable ways as the clip runs on.
Animate Photo with AI is the consumer phrase, and it carries the highest expectation and the lowest tolerance for error. Someone saying "animate my photo" usually means one of two things: keep the photo exactly as it is and add a small amount of life (a blink, a breeze, steam, a slow push), or take the person or product out of the photo and put them somewhere new. Those are different jobs. The first is a first-frame render. The second is a reference render, and it belongs to a different tool. Mixing the two intents inside one prompt is the single most common reason a render drifts — the model is being asked to both preserve and reimagine the same pixels.
So: two of these phrases name a job, two name an input, one names a category. Pick the job first. Then the input. Then the model, the length, and the format. A guide that treats them as five apps will send you to the wrong checkout.
Why starting from a still is the stronger route
Text-to-video has one enormous advantage: it can produce anything. That advantage is also its problem. When nothing is fixed, everything is a guess, and a model that has to guess the subject, the wardrobe, the room, and the light has a large space of plausible answers. Some of them are beautiful and none of them are your product.
An image to video render fixes most of that space in advance. The subject, the framing, the lighting, the colour cast, the label, the room — all of it arrives as evidence. The model's only real job is temporal: what moves, in which direction, at what speed. That is a much smaller problem, which is why the same prompt that produces mush in text-to-video can produce a usable clip in an image to video pass.
There is a commercial argument too, and it is the one that matters to a shop. A photograph is already the approved artefact. It has been through a photographer, a retoucher, and a brand review. Re-rendering it as a generated scene throws that approval away. Animating it keeps the approval and adds a dimension. Z Video's own framing of the problem draws exactly this line: text-to-video invents the subject, while an image to video pass animates the frame you already shot or designed.
That is also why the output of an image to video render tends to look more "real" than text-to-video of the same subject. It is not that the model is better. It is that the hardest part — deciding what the thing looks like — was already decided by a camera.
The same logic explains why a bad source photo cannot be rescued later. If the frame is soft, cropped wrong, or full of clutter, the fix belongs upstream — which is why the prompt-based photo editing workflow is usually the step before the video step, not an alternative to it. Clean the still, then animate it.
What the model is actually doing, in plain terms
A useful mental model: the model is not moving your photo. It is re-drawing your photo many times per second and trying to make each drawing agree with the last one and with your prompt.
That single sentence explains nearly every artefact you will meet.
Because each frame is a fresh prediction, small errors accumulate. A jaw that is two percent narrower in frame forty is a different person by frame four hundred. Because the model has only ever seen your subject from the angle in your photo, any request that rotates the head or orbits the body forces it to extrapolate — inventing the ear, the back of the hair, the far cheek. Because fine texture is resolved slightly differently frame to frame, flat surfaces can "boil." Because newly revealed areas behind a moving camera were never in the photo, the model hallucinates them, which is how a push-in past a doorway creates a corridor that was not there.
Long clips, large camera moves, faces that are small in the frame, heavy occlusion, and prompts that ask for three things at once all make each of these worse. Every fix later in this guide is a version of the same idea: reduce the amount the model has to invent.
The five settings that decide the result
Before any prompt is typed, five settings have already shaped the outcome.
The source frame. Motion amplifies whatever is already wrong. Soft focus smears into mush, compression artefacts crawl, and a busy background pulls the camera off the subject. What you want is sharp focus, even light, one unambiguous subject, and visible separation between that subject and what is behind it — that separation is what gives a camera move its parallax. A flat, evenly-lit image animates flat.
The motion brief. This is the text box, and it is the most overused and least understood control in every one of these tools. More on it below.
The renderer. Different engines have genuinely different strengths, and they differ on price, maximum length, resolution, and whether sound comes with the picture.
The duration. Short clips drift less. Eight seconds is not a limitation invented by the vendor; it is roughly the length at which identity still holds for a single pass.
The aspect ratio. 16:9 and 9:16 are not interchangeable crops. A vertical frame needs the subject centred and the headroom planned. Deciding this after the render means either re-rendering or watching the top of someone's head leave the frame.
On the workspace used as the example here, those five decisions live on one page. You drop in a frame, write the move, pick a renderer and a ratio, and the generate button carries a live credit figure that recalculates as you change any of them — the cost is visible before anything is queued, which is the only sane way to run a tool that charges per attempt.
How to make the clip, step by step
Step one: fix the frame before you animate it
This is the step people skip, and it is the one that decides whether the render is usable. A photo that is soft, cluttered, or cropped to the wrong ratio will produce a clip that is soft, cluttered, and cropped to the wrong ratio — with motion on top.
The workspace in this example puts an image tab beside the video tab for exactly this reason. Uncropping widens a tight frame to the ratio you actually need. Background removal fixes a cluttered source. Upscaling adds the detail the model anchors to. Doing that prep first is cheaper than discovering the problem after three attempts.
Worth knowing: the model cannot recover an eye that sunglasses hid, or a jawline that a heavy filter smoothed away. Resolution is not information.
Step two: write the movement, not the scene
Your photo already contains the scene. The prompt's job is narrow: say what changes.
The formula that survives contact with these models is three parts — camera move, in-frame action, atmosphere — in twenty to forty words. One primary motion. Positive phrasing, because describing what you do not want tends to summon it.
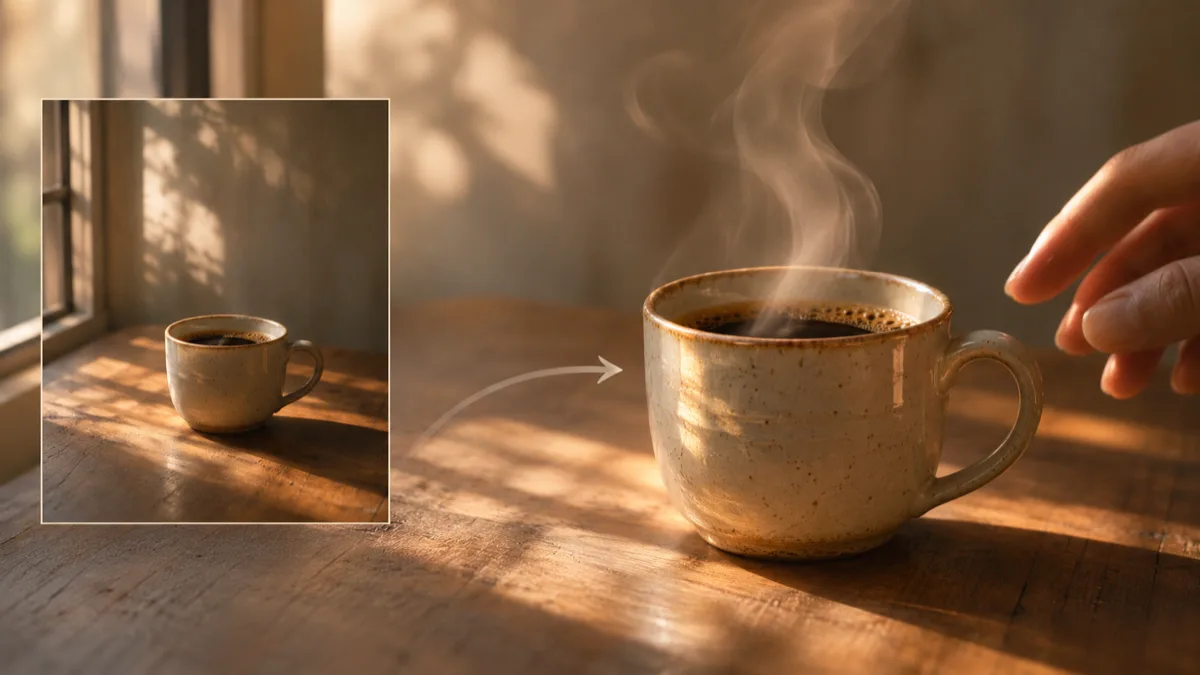
Slow push-in. Steam curls upward from the cup and sunlight shifts across the glaze. Warm morning light, soft shadow falloff.
Compare that with the version that fails:
A cinematic, moody, ultra-detailed shot of a beautiful ceramic coffee cup on a rustic wooden table with steam, golden light, shallow depth of field, film grain, 4k, masterpiece.
The second prompt spends every word re-describing what the model can already see, and adds a mood the source photo does not contain. The model resolves the conflict by changing the picture.
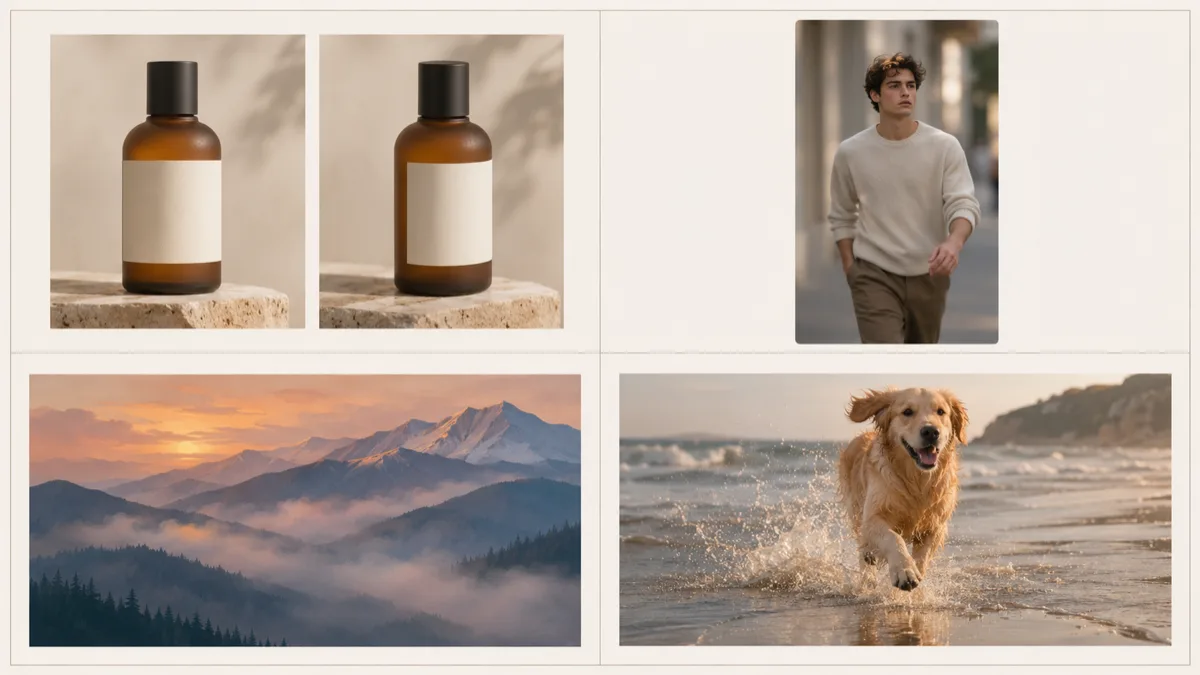
Z Video's prompt library is a decent calibration aid precisely because each example is one line of camera instruction attached to a visible still: a tracking shot alongside a dog on a beach, a quarter orbit around a group toasting, a top-down push-in over a flat lay with a hand entering from the right edge. None of them describe the scene. All of them name the movement.
Step three: choose the renderer against the job
Four engines are listed on the page read on November 5, 2026. The differences that matter are length, resolution, and audio.
| Renderer | Length | Resolution | Audio | Credits |
|---|---|---|---|---|
| Veo 3.1 Fast | 8s | fixed output | generated with picture | 80 |
| Veo 3.1 Quality | 8s | fixed output | generated with picture | 700 |
| Sora 2 | 10s or 15s | fixed output | generated with picture | from 150, 250 for 15s |
| Seedance 2.0 | 4s, 8s, 12s | 480p, 720p, 1080p | picture only | from 40, scales with length and resolution |
The practical reading: Fast is the draft engine, Quality is the finishing pass, Sora 2 is for shots where objects need to behave like objects and you want the longest single cut, and Seedance is the flexible one when you need a specific length or a 1080p master. The same source frame works in all four, which is the real advantage of a single console — you can test the framing on the cheap engine and re-run the winner on the expensive one without rebuilding the job.
That last point is worth more than it sounds. The 80-versus-700 credit gap between the two Veo tiers is the difference between "is this framing even working" and "this is the file I ship." Most people spend that gap in the wrong order: they render the expensive pass first, discover the camera move overshoots, and pay again.
Step four: choose duration and ratio together
Eight seconds of a slow push is a different shot from eight seconds of an orbit. A slow move reads as intentional at eight; a fast one reads as a mistake. If the idea needs a beat at the end — a reveal, a turn, a splash — you need twelve or fifteen, and you need to pick the engine that offers them.
For ratio: 16:9 for a site hero, a product page, a YouTube pre-roll; 9:16 for Reels, Shorts, and TikTok. Render the ratio you will publish. A centre-cropped widescreen clip usually loses the composition that made the frame worth animating.
Step five: render, watch, and re-run with one change
Watch the first take with the sound on, then again watching only the subject's hands and face. Most first takes are eighty percent right and fail in one specific place. Change one variable — less camera movement, a shorter duration, a tighter source crop — rather than rewriting the brief wholesale. Rewriting everything means you learn nothing about which instruction caused the failure.
Keep the takes. Renders land in a history gallery, and the clip that looked wrong on a laptop often reads fine at phone size. There is also a real argument for rendering one clip and using only four or five seconds of it: inside a twelve-second render there are usually several usable moments, and the best cut is often not the whole file.
The camera moves, and what each one costs you
Camera moves are not decoration. Each one asks the model for a different amount of invention, and the amount of invention is the risk.
| Move | What it asks for | Risk | Best for |
|---|---|---|---|
| Locked static | Nothing but in-frame motion | Lowest | Portraits, product detail, anything with visible text |
| Slow push-in | Extrapolating the edges slightly | Low | Product reveals, drawing the eye in |
| Slow pull-back | Inventing the wider room | Medium | Context reveals, hero openers |
| Gentle pan | Inventing the adjacent area | Medium | Landscapes, wide interiors |
| Side tracking | Inventing the whole background parallax | Medium-high | Walking shots, street scenes |
| Orbit | Inventing the far side of the subject | High | Objects with no readable text, characters |
| Fast orbit or crane | Inventing most of the scene | Highest | Almost nothing on the first attempt |
The pattern: the more of the frame the camera has to leave, the more the model has to invent, and the more likely it is to invent something wrong. If your subject has a label, a logo, or a face, lock the camera and let the subject move instead.
When the render goes wrong
These are the failures you will actually see, and the first fix to try for each.
The face becomes a different person. The brief asked for a head turn or an expression the source did not support. Keep the head near its original angle, ask for one small change, and explicitly preserve identity, hair, and skin tone. A front-facing, evenly-lit source is the cheapest fix available.
Fingers merge or multiply. Hands are small, densely detailed, and full of overlapping shapes. Make the hand nearly still, or compose so the hands are not the subject. If a gesture is the point, start from a source where every visible finger has a clean outline.
The background changes. A camera move revealed area that was never photographed. Slow the move down, or switch to locked and let the subject carry the motion.
Text and logos garble. Small lettering is exactly the kind of fine detail that gets resolved differently each frame. Keep text large in the frame, or animate a version without text and overlay the real thing in your editor afterwards. This is the single most reliable way to protect a brand mark.
Surfaces boil or shimmer. The prompt asked for complex texture. Simple surfaces and a slower move reduce it; a light denoise or upscale afterwards helps more than a re-render.
The clip barely moves. The prompt used adjectives instead of a visible action. "Cinematic" is not motion. "The camera pushes in while steam rises" is.
The motion is chaotic. Two or three instructions were competing. Keep one primary motion per generation.
Objects pass through each other. The model learned regularity, not physics. Avoid crossings and overlaps in the composition; cut before the moment breaks.
There is a meta-lesson across all seven: when a render fails, the fix is almost always subtraction. Less camera, less gesture, less duration, fewer clauses.
One failure that is not on that list is worth naming, because it is the one that gets posted by accident: a clip that technically moves but reads as a template. If the subject is a trend rather than your own frame — a meme format, a duo lip-sync, a viral desk performance — the interesting question shifts from "how do I animate this photo" to "how faithful to the format does this need to be," and a general model is usually the wrong tool for a locked format. The 58th Floor AI video breakdown is the clearest example on this site of the opposite case: four timed shots that no prompt will reconstruct from a title.
What this is genuinely good for
Four jobs come up again and again, and they map onto different parts of the workflow.
Product listings. One packshot becomes an orbit or a push-in for a product page, an ad, or a marketplace gallery. The label and SKU stay put because they came from the photo. This is the highest-return use of the technique, because a reshoot is expensive and a render is not.
Vertical social from one still. One candid photo becomes a 9:16 cut that feels native to Reels, Shorts, and TikTok. The moment is preserved; only the camera moves. Being able to render the vertical version from the same approved frame, rather than recomposing, is the difference between posting today and posting next week.
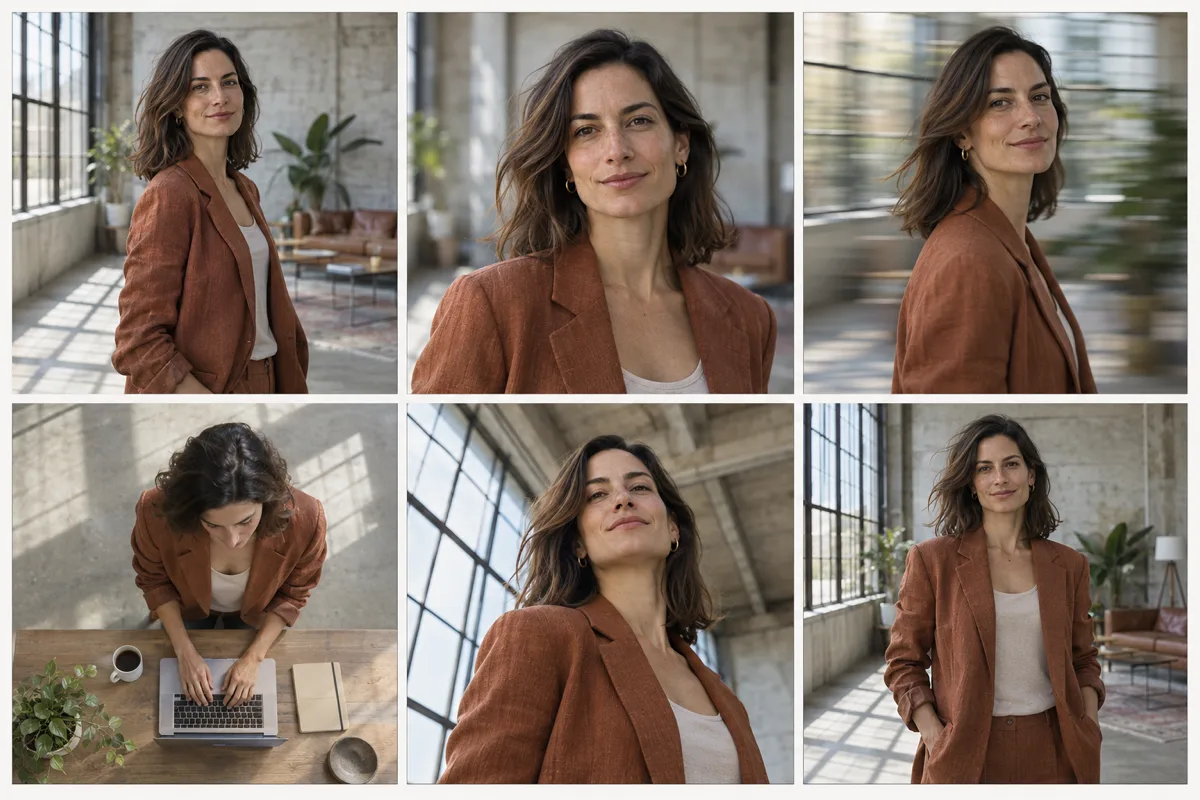
Founder and spokesperson clips. Starting from a real face is not a stylistic preference here, it is a correctness requirement. Text-to-video will invent a person. An image-conditioned pass has to respect the one you uploaded. When the whole point is that this is a real person saying a real thing, that constraint is the feature.
A character or a set across multiple shots. Lock a character in a frame, then run different camera briefs against it. Wardrobe and identity hold across the set far better than they do across independent text prompts, because each render starts from the same evidence.
The common thread is not "AI video." It is "motion for assets that cannot be reshot."
The fourth case is where the boundary between image prep and video gets interesting. If the character has to hold across a whole set of stills first, that is an AI photo editing problem before it is a video problem — the identity work happens upstream, and the animator inherits it. Where a single still needs wider framing before it can move, uncropping it to the target ratio is cheaper than re-rendering a camera move that keeps clipping the subject.
What a clip actually costs, and how to stop wasting credits
Every one of these tools sells credits, and the credit price swings hard by model, length, and resolution. That makes the arithmetic worth doing before you commit.
On the pricing page read on November 5, 2026, the annual plans are Starter at $9.9 a month (9,600 credits), Pro at $19.9 (24,000), and Studio at $44.9 (72,000), with monthly billing at $19.8, $39.8, and $89.8 respectively. Commercial use, watermark-free downloads, and 1080p, where the model allows it, are included on every paid tier. Only the volume changes. There are free credits on sign-up.
The useful comparison is not dollars, it is renders per month:
- 9,600 credits is 120 Veo 3.1 Fast passes, or 13 Sora 2 ten-second cuts, or 240 Seedance 2.0 short 480p cuts.
- 24,000 credits is 300 Fast passes, or 34 Sora 2 ten-second cuts.
- A single Veo 3.1 Quality render at 700 credits is the same spend as almost nine Fast passes.
That last line is the whole budgeting strategy. Draft on the cheap engine, finish on the expensive one, and do not confuse the two. A first take exists to answer one question — does this framing and this camera move work? — and an 80-credit render answers it as well as a 700-credit one.
Two habits save real money. First, decide the duration before writing the brief; discovering you need twelve seconds after paying for eight is a wasted render. Second, watch the whole clip at phone size before re-running. A surprising number of "failures" are only visible at full screen, and a surprising number of "problems" disappear at feed size.
The part that is not about the model
Three things decide whether the clip is publishable, and none of them are settings.
Consent. Upload only photos you have the right to use, and keep identifiable people out of it unless you have their permission. Every credible tool states this in its terms; it is also the law in most places that matter commercially. A photo of a stranger from a stock site is not the same as a licence to render them moving.
Disclosure. If the result could plausibly be mistaken for something that happened, label it. Platforms ask for it, audiences expect it, and it costs one line in a caption. The moment a generated clip is presented as documentation, the whole technique becomes a liability rather than a tool.
Commercial scope. Paid plans on the example workspace carry a commercial-use licence covering ads, social, listings, and client work. But the underlying model providers can attach their own restrictions on top, so for anything high-stakes, read both. "My subscription says commercial use" is half the answer.
Publishing checklist
Run this before the clip leaves your machine.
- Is the ratio the one you are publishing in, not the one you rendered in?
- Does something happen in the first second? A slow push that starts imperceptibly loses a third of viewers before it becomes visible.
- Does it loop, or does it end on a hard stop? Feeds reward loops.
- Is the highest-value detail — label, face, product silhouette — readable at phone size?
- Are the hands and the face clean at the moment they are largest?
- Is the AI disclosure on, where the platform asks for it?
- Is the exported file the clean download, not a preview with a watermark?
None of these require a better model. All of them decide whether the render was worth the credits.
Frequently asked
Do I need a photo at all? No. Leave the upload tile empty and write the whole scene in the prompt to run text-to-video. Starting from a photograph is simply the stronger route whenever a real product, an approved key visual, or a recognisable face has to end up in the clip.
Can I get sound? On Sora 2 and Veo 3.1 the audio is generated with the picture, so ambience and effects land already matched to the action rather than being laid underneath afterwards. Seedance renders picture only. If you want a silent deliverable, mute the track on export.
How long can one clip be? Eight seconds on both Veo tiers, ten or fifteen on Sora 2, four to twelve on Seedance 2.0. Anything longer is assembled from several renders and cut together in an editor. That is normal, not a workaround.
Is a better model going to fix a bad source photo? No. A frontier renderer will produce a sharper, more confident version of the same problem. Fix the frame first.
Why does the same prompt give different results twice? These are stochastic systems. Two renders of the same job are two samples from a distribution. That is why the cheap draft pass exists, and why you should keep the take you like rather than assuming you can regenerate it.
The honest summary of this whole category is that image to video is not magic and it is not a filter. It is a constrained generation problem, and the constraint is the photo you bring. Get the frame right, ask for one movement, pick the engine that matches the length you need, and treat the first render as a question rather than an answer. Do that and the clip looks like your photo, because it is your photo — with the camera finally moving.