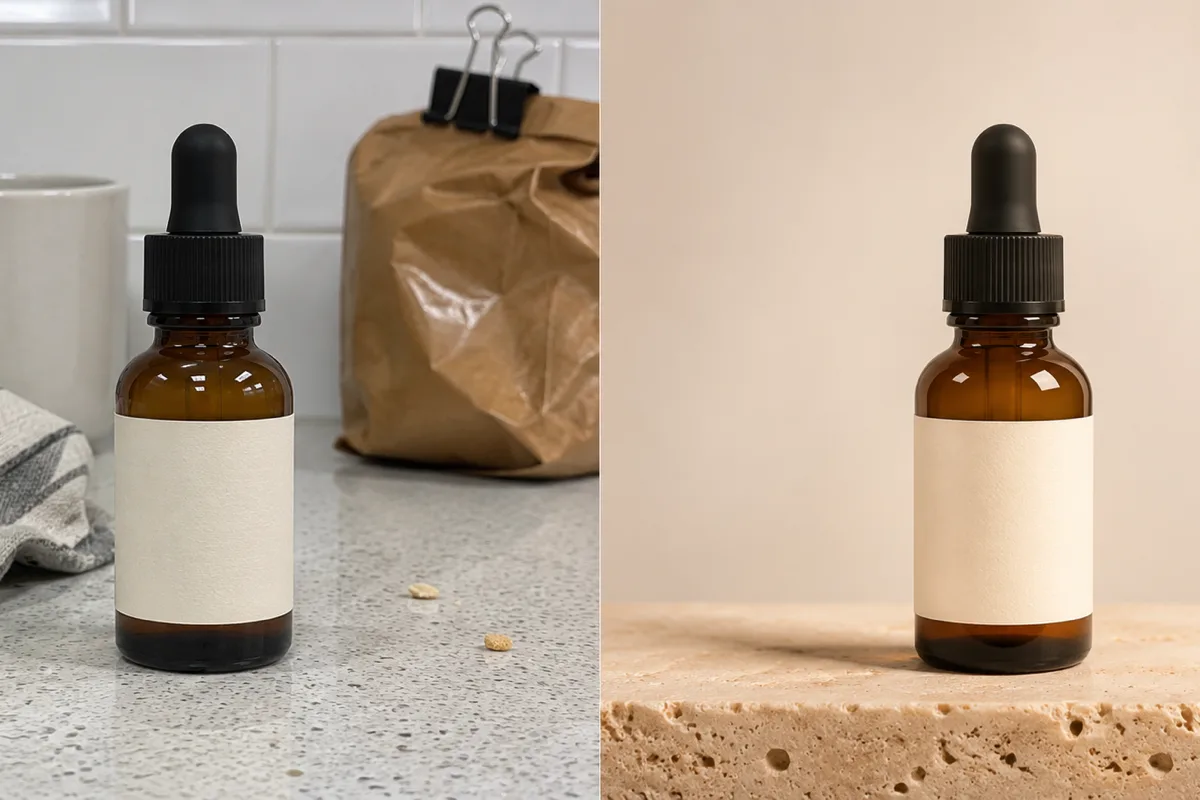
The photograph is fine. That is the problem. A serum bottle sits on a kitchen counter at eight in the morning, the light is flat, the tea towel is in frame, and the file is the only photograph of that batch anyone took. The listing needs it on travertine by Thursday. Nobody is booking a studio for one bottle.
Traditionally there were two answers, and both were bad. You reshoot, which costs a day and a photographer. Or you composite, which costs an afternoon in a layers program and produces something that looks like a composite. Prompt based photo editing is the third answer: upload the frame, describe the change in a sentence, and let a model rebuild the parts you named while leaving the rest alone.
That last clause is where most tutorials quietly lie. Not because the tools are dishonest, but because the promise is easy to misread. A prompt-driven editor does not cut the bottle out and slide it onto a new background. It looks at your photograph, forms an internal description of it, applies your sentence to that description, and generates a new image. Everything you wanted to keep is being reconstructed, not preserved. The bottle survives because the model reconstructed it well, not because it was protected by a mask.
Once you accept that, the craft changes. You stop writing wishes and start writing briefs with a preservation clause. This guide is about that craft, and the worked example is MeiGen AI, a browser studio read on November 4, 2026. It is an independent service. This page is published on happyhorse2.video, which makes short video from photos and prompts and does not run this editor; a credit balance in one place does not spend in the other.
Five searches, one job, two inputs
People arrive at this topic with different words. The words matter, because each one carries a different assumption about what the tool is for.
MeiGen AI is the product name, and the shortest search. It is a prompt-first editor and generator at meigenai.co that runs in a browser tab. There is no install and no separate app per task. The homepage is the tool: one prompt bar, an upload tray, a model picker, and a results panel.
AI Photo Editor describes an intention rather than a technology. The searcher has a photograph and wants it improved, changed, or made publishable. They are thinking about a specific file with a specific flaw: a grey sky, a stranger in the background, a product that looks cheap because the countertop looks cheap.
AI Image Generator is the opposite starting point. Nothing exists yet. The searcher wants a concept, a mood board, a hero image for a page that has no photography budget. There is no file to protect, so the only craft is in the prompt.
AI Image Editor Online is the delivery constraint. Someone has used a desktop tool, hated the update cycle, and wants the whole job in a tab: upload, edit, download. "Online" also carries a privacy question, because the file leaves the machine. It is worth knowing where uploads go and what the policy says before you send a client's unreleased packaging.
Prompt Based Photo Editing is the mechanic, and it is the phrase that gets misread most often. It sounds like a command line for a retoucher: remove this, lighten that, done. In practice it is closer to a brief for a reshoot. You are describing a scene the model must produce, with your original as the reference for what the scene has to contain.
Read together, those five searches describe one bar with two inputs. Attach a photo and the same bar becomes an editor. Leave the tray empty and it becomes a generator. The interesting engineering is not that both exist. It is that the same account, the same model list, and the same credit balance cover both, so a campaign can start as a generated concept and finish as an edit of a real product without changing tools.
What MeiGen AI actually is
Strip the marketing and the product is a routing layer. MeiGen AI does not train its own image models. It connects to models built by other companies and gives them one interface, one credit balance, and one output history. On November 4, 2026 the image list ran to nine: GPT Image 2, Nano Banana Pro, Nano Banana 2, Nano Banana, Seedream 5 Lite, Seedream 4.5, Grok Imagine, Wan 2.7 Image, and Qwen Image 2. The same bar also lists four video models — Veo 3.1 Fast, Veo 3.1 Quality, Sora 2, and Seedance 1.5 Pro — which is a different job, but relevant to anyone building a campaign that ends in motion.
Four details do most of the work in practice.
The uploads. PNG, JPG, and WebP, with a size limit printed next to the uploader. One photo edits one photo. Several photos become references, which is a different operation with different rules.
The references. How many images a model accepts depends on the model, and the interface shows the limit before you spend anything. Nano Banana 2 and the Seedream models take up to fourteen. Wan 2.7 takes up to nine. A face, a product, a location, and a style frame can all be in the same request, provided you say in the prompt what each one is for.
The resolution. 1K, 2K, or 4K on the models that offer it — currently GPT Image 2, Nano Banana Pro, Nano Banana 2, and Wan 2.7 Image. Drafting at 1K and finishing at 4K is the single most reliable way to keep costs sane, and the interface makes the price of that decision visible.
The history. Every result lands in My Creations with the prompt that produced it, and downloads are PNG or WebP. That archive is not a nice-to-have. When a client asks for "the warm one, three versions back," it is the only thing that saves the afternoon.
Credits are charged per job, not per month of access, and the amount depends on the model, the resolution, and how many results you request. The Generate button shows the cost before anything is sent, next to your remaining balance; GPT Image 2 starts around 10 credits for a single 1K render. If a job fails on the provider side, the reserved credits return. Plans run from a 9.9 USD monthly-equivalent starter tier billed yearly, which the pricing page equates to roughly eighty images a month, up through tiers sized for studios. The site also states that commercial use and watermark-free exports come with paid plans, which is the detail that decides whether a freelancer can hand a file to a client at all.
Two structural notes worth knowing before you sign in. Prompts and uploads pass through automated moderation before a model runs, so an awkward concept will be refused rather than rendered. And the site's own editorial policy says it dates each page and declines to publish speed or quality verdicts it cannot reproduce — which is why this article quotes what the interface shows rather than asserting that any one model "wins."
Why a prompt edit is a reshoot
Here is the mechanism, without the mystique.
Image-to-image models take your picture, compress it into a representation, and then denoise a new picture from noise toward that representation while your text nudges the process. The starting image acts as a spatial anchor, so composition and identity tend to survive by default. But anything the representation captured loosely comes back loosely. A face is reconstructed from an approximation of a face. A label is reconstructed from an impression of a label. Do that once and it looks great. Do it five times in a row, each edit built on the last output, and the approximations compound until the bottle has drifted ten percent wider and the type has become decoration.
That is the whole risk model, and it explains every piece of advice in this guide.
A mask changes the equation. When you paint a region, the model is allowed to generate only inside it, and the pixels outside are left alone. That is inpainting, and it is surgical. A prompt bar without a brush is the other mode: whole-frame regeneration guided by language. Less control, more speed, and a much better fit for a phone snapshot that needs to become a studio photograph rather than a label that needs one word corrected.
The practical consequence is the preservation clause. An instruction that says only what to change leaves everything else to the model's discretion. An instruction that also lists what must stay identical constrains the reconstruction. The second kind of sentence is worth more than every synonym for "photorealistic" combined.
Step one: read the source photo like a photographer
Before the prompt, the file. Three checks take ninety seconds and save credits.
Is there enough photograph? A tight crop gives the model less context to continue. If the bottle occupies a tenth of the frame and the rest is a wall, the model has to invent a set from almost nothing. Crop closer on the subject in any ordinary editor and upload that.
What is already competing for attention? A mug, a phone, a stack of receipts. You can ask for their removal, but removal is the hardest thing to ask of a model when the objects overlap the subject. Cheaper to move the mug before you shoot, if the object still exists in the world.
Is anything you need clipped? If the top of the label is cut off, no prompt returns it. The model will invent a plausible top, and plausible is not the same as correct. Same for a hand, a shoulder, or the last letter of a brand name.
One more: keep the original. Never overwrite the source with a generated result. Every later step in this guide assumes you can go back.
Step two: choose the job, then the model
Two decisions, in this order, because they are not the same decision.
The job is either generate or edit. Generate when the picture does not exist: a concept board for a launch that has no product yet, three background options before a shoot, a visual for a page that will never justify a photographer. Edit when the picture does exist and something about it must survive: the label, the silhouette, the face, the room.
The model is a question about what you cannot afford to lose.
If the deliverable contains words — a poster, a packaging mock-up, a price card — start where lettering is strongest, which on this roster means GPT Image 2. It also happens to be the model the site prices lowest for a single render, so a bad idea costs less to discover.
If the deliverable is a hero image that will be zoomed, or anything destined for print, start where detail and resolution are strongest: Nano Banana Pro at 2K or 4K.
If the deliverable is a character, a wardrobe, or a product that must appear in several frames, start where reference capacity is largest: Nano Banana 2 or the Seedream models at up to fourteen images. That is the difference between a consistent series and a set of near-misses.
If you are exploring and expect to throw most results away, draft cheap at 1K on a mid-tier model and only finish the keeper on the expensive one. The site's own guidance says exactly this, and it is the advice that most affects what a month of work costs.
| What must survive | Where to start | First setting |
|---|---|---|
| Readable words in the image | GPT Image 2 | 1K draft, 2K final |
| Fine product detail for print | Nano Banana Pro | 2K or 4K |
| Same face or character across frames | Nano Banana 2 / Seedream | 2–4 references, 2K |
| Several assets in one brief | Nano Banana 2 / Seedream | Up to 14 references |
| A background idea, no product yet | Any model, text-only | 1K, three variations |
Step three: write the prompt in four clauses
This is where the work is. A prompt that survives contact with a model has four clauses, and each one does a different job.
Clause one, the change. One verb, one target. "Replace the kitchen counter with a slab of honey travertine." Not five changes. When you ask for five, the model distributes its attention across five and none of them lands.
Clause two, the preserve list. Name the things that must not move: the bottle shape, the label, the cap, the camera angle, the aspect ratio. Use the words "keep" and "unchanged." This is not politeness; it is the constraint that stops the reconstruction from wandering.
Clause three, material and light. Photographers think in surfaces and sources. Say the material of the new background, the direction and softness of the light, and whether there should be a visible contact shadow. "Two large diffused lights from the left, crisp highlight along the glass, soft shadow falling right" does more than "professional lighting."
Clause four, the output. Frame, crop, and what must not appear. "Portrait 3:4 for an online store, no text, no logos, no watermark." Negative instructions are weak on their own but useful as a final fence.
Here is a weak version and a working version of the same request.
Make this product photo look professional.
That sentence gives the model permission to redesign the product, the label, and the composition, because "professional" is a judgement, not a specification. It is a coin flip that costs credits.
Restyle this photograph as a premium skincare product shot. Keep the amber dropper bottle, its matte black cap, the label shape and the bottle's size exactly as they are. Replace the kitchen counter and background with warm honey travertine, visible natural pores, and a soft cream seamless backdrop. Two large diffused lights from camera left, a crisp continuous highlight down the left edge of the glass, a soft contact shadow falling to the right. Portrait 3:4, product centred with space above, no text, no extra props, no watermark.
The second version is longer, and every extra clause is doing work. It names the change, fences the product, describes the light like a lighting diagram, and closes the frame. It is also the sort of prompt the site's showcase gallery publishes next to each example image, which makes the gallery a useful place to steal structure rather than pictures.
One habit worth building: quote any word that must appear inside the image. Unquoted text becomes decoration. Quoted text is at least an attempt at lettering, and on the models that render lettering well, it is often correct on the first pass — but only check it at 100 percent.
Step four: set the frame before you pay
Aspect ratio is not cosmetic. It decides what the model has to invent.
The bar offers 1:1, 4:3, 3:4, 16:9, 9:16, 2:3, 3:2, 21:9, and Auto. Square for feeds, 4:5 or 9:16 for stories and product pages, 16:9 or 21:9 for banners, 3:4 for a portrait packshot. Choose the ratio the layout actually needs, because a wide frame forces the model to continue the scene sideways, and the sideways continuation is where perspective usually goes strange.
If the frame you need is bigger than the frame you have — a tight product shot that must become a banner — you are asking for an extension rather than a restyle, and the seam becomes the risk. That is a separate craft, covered in our guide to making a wider photo from a tight crop.
Resolution comes second. Draft at 1K while the prompt is still moving. Re-run the keeper at 2K or 4K on a model that supports it. Paying for 4K on an idea you are about to discard is the most common way to burn a credit balance in an afternoon.
Step five: inspect like an editor, not a customer
At thumbnail size, almost everything looks finished. The failures live at 100 percent, and they cluster in predictable places.
Check the label first. Every letter, in order, at full size. Then the silhouette: does the bottle have the same shoulder, the same neck, the same proportion as the file you uploaded? Then the contact shadow — a product that floats is the fastest way to make an otherwise good render look fake. Then the edges: hair, glasses, fingers, jewellery, the boundary between product and background. Then the mood: is the colour temperature consistent across the frame, or does the new background sit at a different hour of the day than the subject?
Five minutes of this, on every result, is the difference between a file you can publish and a file that gets returned by a client two days later.
Step six: iterate from the original, not the last render
The instinct after a nearly-good result is to ask for one more change on top of it. Do that once and it is fine. Do it four times and you are editing a copy of a copy of a copy, and the drift is now structural rather than cosmetic.
The better move is to go back to the source file and issue a combined instruction: the original change plus the new one. Two edits from the source beat four edits in sequence, every time. It also keeps the history honest, so when someone asks which version was approved, you can point at one prompt instead of a chain.
When a single detail is wrong — one letter, one reflection, one shadow — do not rewrite the prompt. Add one targeted correction and nothing else. "Keep everything identical; only straighten the second line of the label." Small, specific follow-ups converge. Large rewrites restart the lottery.
What a working set looks like
A single good image is a demo. A set is a deliverable, and the difference is a system.
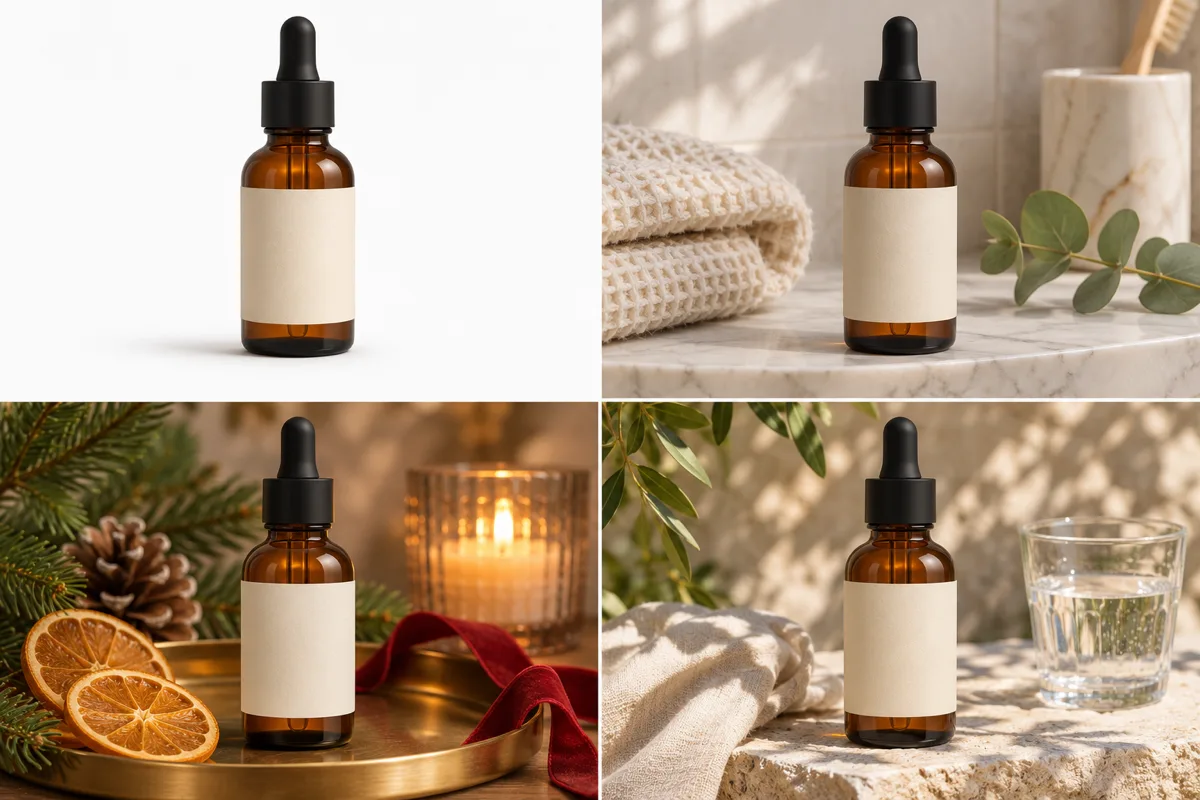
The four-panel example above is the ordinary shape of a small campaign: one product, four contexts, no reshoot. The bottle is identical in every panel because the same source file drove every render and the preserve clause named the bottle explicitly. What changes is the set, the props, and the light. What does not change is the thing the buyer is actually buying.
Two habits make that reliable. First, build the preserve clause once as a reusable block of text — the product, the label, the proportions — and paste it into every prompt in the series. Second, change one variable per render. Setting, then season, then format, not all three at once. When something breaks, you will know which clause did it.
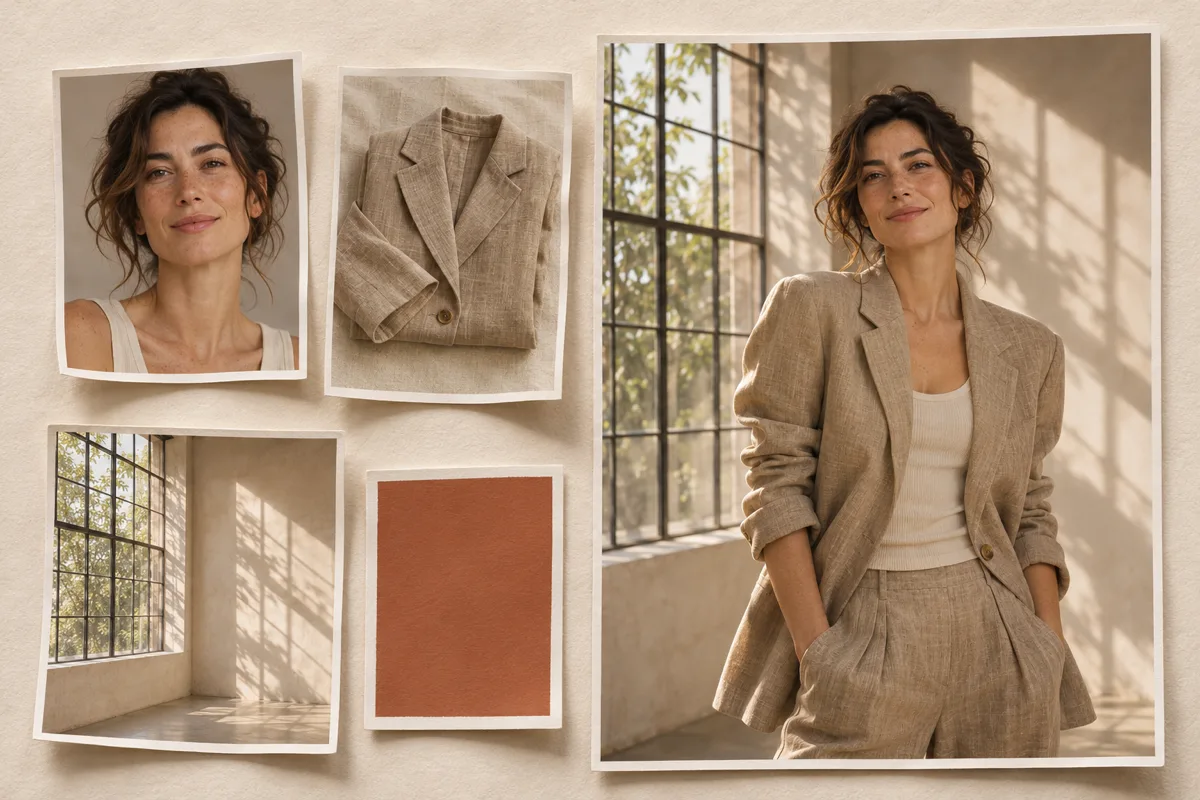
For a character rather than a product, the same logic runs through the reference tray: a clear face, a wardrobe shot, a location, and a style frame, with a sentence explaining the role of each. The model needs to be told which image is the person and which is the mood, or it will average them.
Where prompt editing still fails
Honesty is more useful than a feature list, so here is what does not work yet.
Small type. A headline at poster scale is now often correct. A ten-word ingredient list on a 30 ml bottle is not. If the words must be exact, set them afterwards in a layout tool.
Hands and fine jewellery. Fingers still merge. Rings still grow a sixth band. If a hand is in the hero frame, inspect it first and expect to re-run.
Logo fidelity. A model reconstructs a mark from an impression of a mark. If the mark is a registered asset, do not let a model redraw it. Composite the real file in.
Exact colour. Writing a HEX value into the prompt nudges the palette; it does not guarantee it. Scene lighting shifts colour, and so does the model's own grade. Brand colours belong in post-production where they can be measured.
Likeness and consent. Uploading a face you do not have the right to use is a legal problem, not a prompt problem. The same applies to celebrities, to a client's talent whose contract predates AI, and to children. Check before you render, not after.
Marketplace rules. Some catalogues require a pure white background and no generated props. A beautiful lifestyle shot can still fail compliance. Read the platform's image policy before the shoot, not after the rejection.
Anything that has to be true. A generated bottle can be a different volume from the real one. A generated room can contain a window that does not exist. If the image makes a factual claim about a product, the claim has to be checked against the product, not against the render.
The cost side, honestly
Prompt editing is cheap compared with a studio and expensive compared with doing nothing, and the spread inside a single tool is wide enough to matter.
The mechanics are simple: every job draws credits, the price depends on model, resolution, and number of outputs, and the button tells you the number before you commit. Failed provider jobs return their reservation. Subscriptions grant a monthly allowance; one-time packs exist for people who edit in bursts. On the pricing page as read on November 4, 2026, the yearly starter tier sat at 9.9 USD a month with roughly eighty images' worth of credits, the mid tier at 19.9 USD with roughly two hundred, and the studio tier at 44.9 USD with roughly six hundred — all of which move, so confirm the live numbers rather than trusting a blog post, including this one.
The budgeting rule that actually changes outcomes: spend the cheap credits on decisions and the expensive credits on delivery. Three 1K drafts cost less than one 4K mistake. A batch of four options at draft resolution is a better use of a budget than one hero render you are not sure about. And a credit balance with no plan is a plan to overspend.
A checklist before you spend a credit
- Crop to the subject. If it occupies less than a third of the frame, the model is inventing a set, not editing a photo.
- Write the preserve list before the change. Product, label, proportions, camera angle.
- Pick the model by the thing that must not break, not by the thing that sounds newest.
- Draft at 1K. Decide at 1K. Only finish what survived the decision.
- Set the aspect ratio the layout needs, not the one the source happens to be.
- Quote text that must appear; expect to verify every letter.
- Inspect at 100 percent: label, silhouette, contact shadow, edges, colour temperature.
- Iterate from the original file with a combined instruction, not from the last render.
- Reuse one preserve block across the whole set so the product stays the same product.
- Keep the prompt with the file. My Creations does this automatically; your folder structure should agree.
The short version
Prompt based photo editing works when you treat the prompt as a brief for a reshoot rather than a command to a retoucher. Name the one thing that changes, fence the things that must not, describe the light like a photographer, and close the frame. Choose the model by what it cannot be allowed to break. Draft cheap, finish expensive, inspect at full size, and always iterate from the source.
That workflow is model-independent, which is the point. It will still be the workflow when half the models listed on MeiGen AI have been replaced, because the constraint is not the model. It is the photograph, the label, and the buyer who has to recognise the thing they are being sold.